Setup email account in Outlook
-
Open Add Account wizard
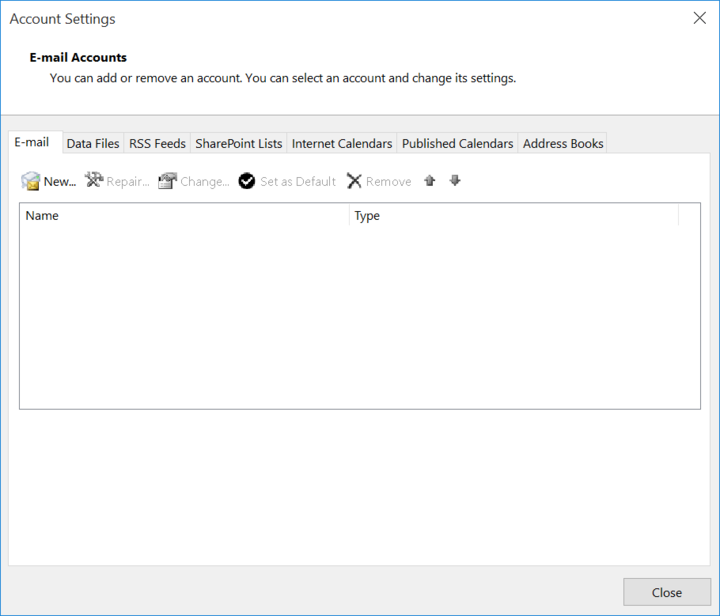
Click on New... in the email tab of the Account Settings dialogue to open the Add Account wizard.
-
Select Manual setup or additional server types
Unless your domain supports Autodiscovery select Manual setup or additional server types and click on Next to continue.
-
Choose Account-Type
Select POP or IMAP as service type and click on "Next" to continue.
-
Enter use and server settings
Enter Your name, and your email address. Select IMAP as Account Type, imap.nine.ch as Incomming mail server and smtp.nine.ch as Outgoing mails server. Repeat your email address as User Name and enter you password. Click on More Settings.. to open the advanced settings dialogue.
-
Change Outgoing Server settings
In the Outgoing Server Tab check **My outgoning server (SMTP) requires authentication." and ensure *Use same settings as my incoming mail server* is selected. Continue to the Advanced tab.
-
Change advanced encryption settings
Set the Incoming server (IMAP): port to 143 and the type of encryption to TLS. Set the Outgoing server (SMTP): port to 587 and the type of encryption to TLS. Click on OK to close the advanced settings dialogue. Back in the Add Account dialogue click on Next to continue.
-
Test Account Settings
Outlook is proceeding with testing the account settings. This should succeed and the dialogue can be closed by a click on "*Close**.
-
Finish
The account is configured and ready for use. Close the wizard by a click on Finish.